1 Work in small groups.
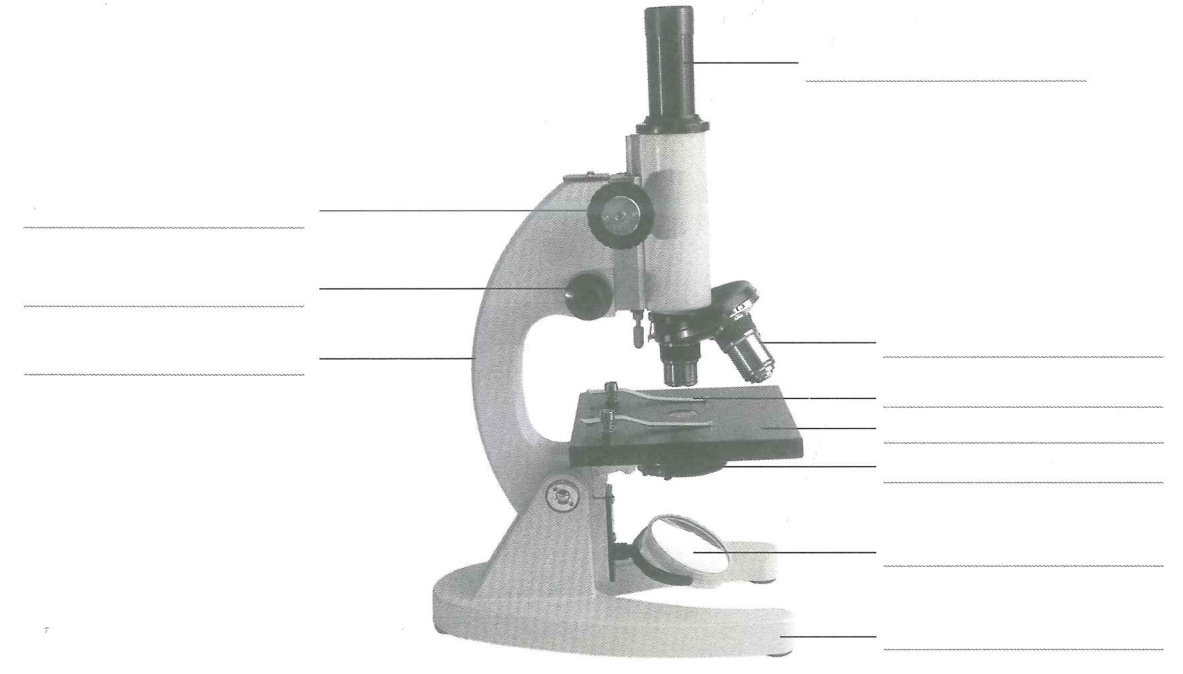
2 Listen as your teacher explains the functions of the different parts of a microscope.
3 Label the parts of a microscope in the diagram below.
Complete the table to find the magnification of the microscope.
| Magnification of the eyepiece | Magnification of the objective lens | Magnification of the microscope (Magnification of eyepiece × magnification of objective lens) |
|---|---|---|
| | | |
| | | |
| | | |
7 Put the lowest power objective lens in place. Use the coarse adjustment wheel to move the objective lens as far away from the stage as possible. Place a strand of hair on the stage, so that part of it is over the hole in the stage. Turn the coarse adjustment wheel to bring the image into focus.
8 Rotate the lenses so that a higher-power objective lens is now above the slide. Then use the fine adjustment wheel to bring the image into focus. Do not use the coarse adjustment wheel (since this may push the objective lens into your specimen).
Materials: eye protection such as safety goggles, dropper, water, pair of forceps (tweezers), piece of onion, glass slide, iodine solution, coverslip, mounted needle, filter paper, microscope.
1 Squeeze the bulb of the dropper very gently and then dip it in the water. Release the bulb to allow a small amount of water to enter the dropper. Now place the dropper over the centre of a glass slide, and gently squeeze the bulb to add a drop of water to the slide.
2 Using a pair of forceps, gently peel back a single layer of onion tissue (epidermis) from the onion. The layer should be almost see-through. Spread a small piece of the onion epidermis into the water on the glass slide.
3 Use the dropper to add one or two drops of iodine solution to the onion epidermis. This will stain some parts of the cell, making them easier to see.
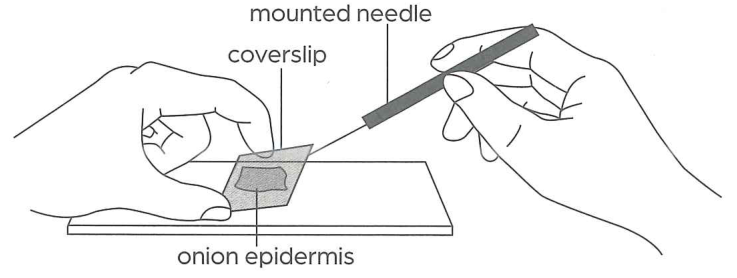
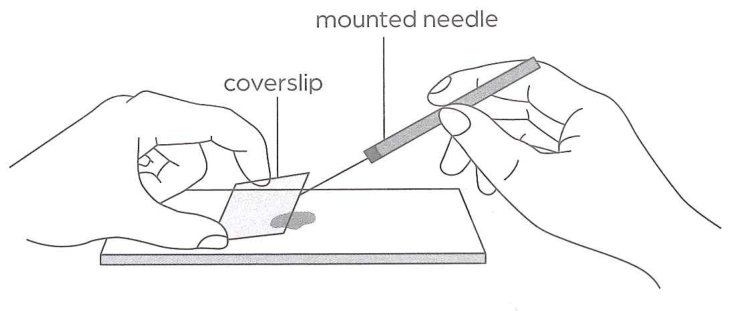
4 Place one end of a coverslip against the slide. Support the other end with a mounted needle.
5 Lower the other end of the coverslip gently, using the mounted needle. This will prevent air bubbles from being trapped under the coverslip.
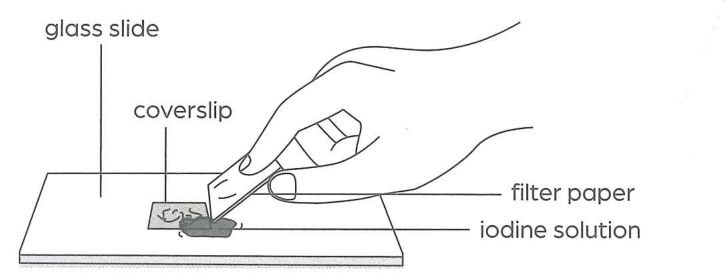
6 Carefully soak up any excess liquid using filter paper.
7 Put the lowest power objective lens of a microscope in place. Use the coarse adjustment wheel to move the lens as far away from the stage as possible. Place the slide on the stage of the microscope. Secure it with the stage clips.
8 Observe the cells by looking through the eyepiece of the microscope.
a Find the onion cells using the low-power objective lens. Turn the coarse adjustment wheel to bring the image into focus.
b Rotate the lenses so that a higher-power objective lens is now above the slide. Then use the fine adjustment wheel to bring the image into focus.
Caution: Handle the glass slide and coverslip with care as they can break easily. Handle mounted needles with extreme care and only leave them in a place where you and others can see them. Iodine solution is harmful to skin and is dangerous to the eyes. It stains the skin and clothing readily. Wear eye protection such as safety goggles, and do not touch the solution. Use it very carefully. Turn the adjustment wheel slowly. Check from the side so that the objective lens does not hit the glass slide.
9 Draw one onion cell. Label the cell parts that you can observe. Make sure you include the edges of the cells around it. Record the magnification of the microscope.
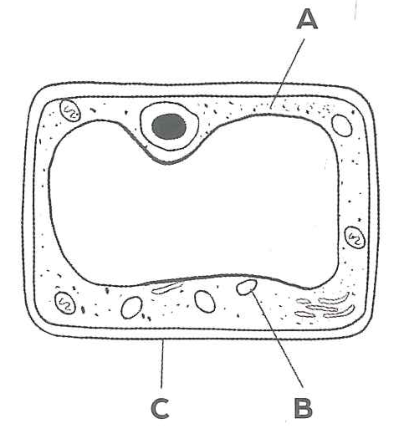
How well do the cells you observed compare to the model of a plant cell you have learnt about? Did learning the model help you to identify parts of the real cells?
Materials: Eye protection such as safety goggles, dropper, water, glass slide, sterile cotton bud, methylene blue solution, coverslip, mounted needle, filter paper, microscope.
Procedure and Observations
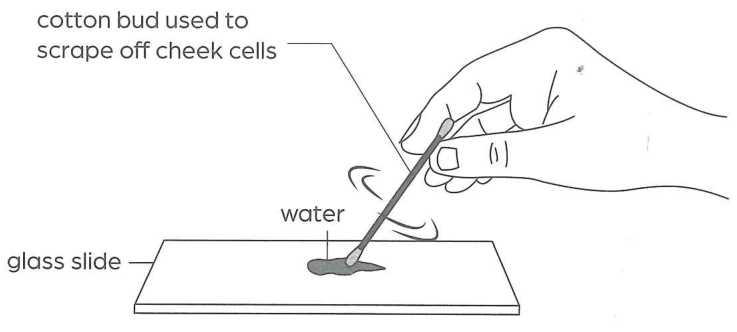
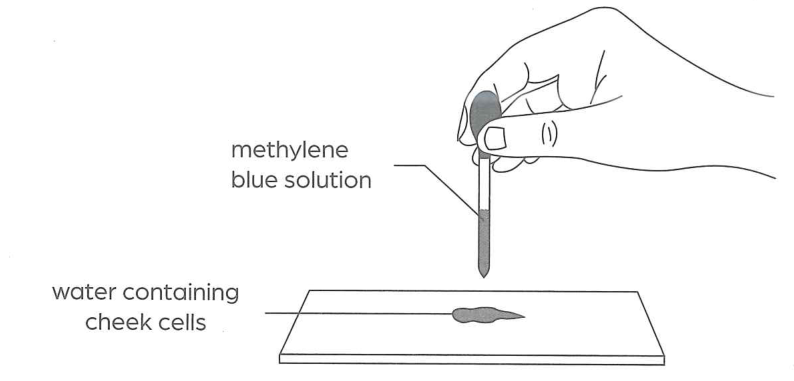
1. Use a dropper to place a drop of water on a glass slide.
2. Use a sterile cotton bud to gently scrape some cells from the inside of your cheek.
3. Rub the end of the cotton bud with scrapings onto the centre of the glass slide.
4. Add a drop of methylene blue solution to the scrapings on the slide. This will stain some parts of the cell, making them easier to see.
5. Carefully lower a coverslip onto the slide as described in Activity 3B.
6. Place the filter paper at the edge of the coverslip to carefully soak up any excess liquid.
7. Place the slide on the stage of a microscope. Secure it with the stage clips.
8. Observe the cells using the steps described in Activity 3B. Use the low-power objective lens and then the high-power objective lens, focusing the image each time.
Caution: Use your own cheek cells and handle your own glass slide only. Place the cotton bud in disinfectant right after use. Do not allow the cotton bud to touch the bench. Handle the glass slide and coverslip with care as they can break easily. Methylene blue is harmful to skin and is dangerous to the eyes. It is also harmful if swallowed. Wear eye protection such as safety goggles. Do not touch the solution or put it in/near your mouth. Use it very carefully. Handle mounted needles with extreme care and only leave them in a place where you and others can see them. When turning the adjustment wheel to focus the image, do it slowly. When using the higher-power objective lenses, only use the fine adjustment wheel and ensure that the objective lens does not hit the glass slide.
9. Draw two to three cheek cells. Label the cell parts that you can observe. Record the magnification of the microscope.
Materials: Access to the Internet or library books.
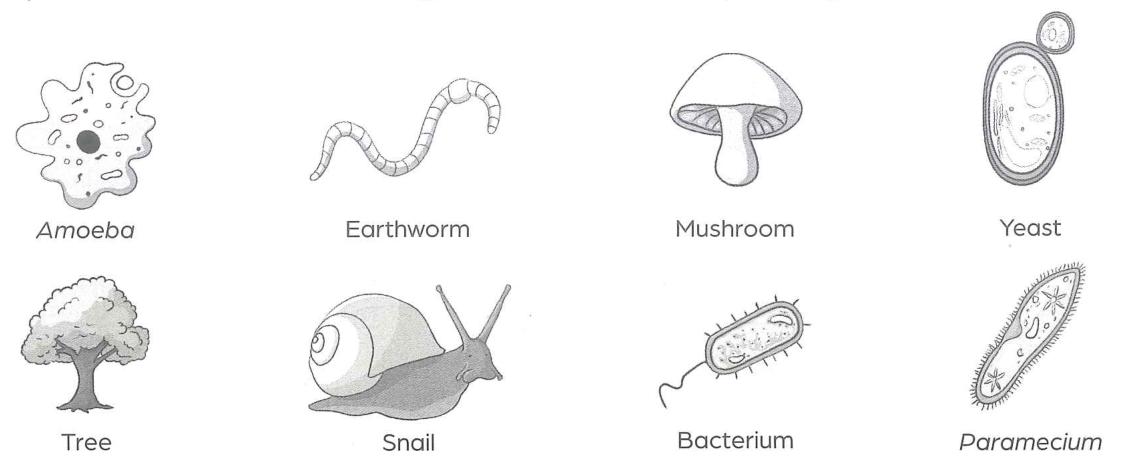
1. Work in small groups. Choose a specialised cell for your group to focus on. Your teacher may also assign a specialised cell to your group. Some examples of specialised cells are shown here:
2. Research your chosen specialised cell using a variety of sources from the Internet, as well as from the library if you have access to it.
3. Gather information on the structure, function and importance of this specialised cell.
4. Evaluate the sources you have used.
5. Present your results to the rest of the class, ideally as an oral presentation with a poster or similar graphic presentation. You should include information about the cell and also explain briefly how you have selected some sources but ignored others.
Tick (✓) to show how confident you are of the concepts. Revise the relevant Student’s Book section(s) if needed.
| I can now: | Yes | Not sure | No | Students Book section(s) |
|---|---|---|---|---|
| Understand that living things are made up of cells. | □ | □ | □ | 3.1 |
| Understand that microorganisms are usually only a single cell. | □ | □ | □ | 3.1 |
| Identify and describe the different parts of a typical animal cell and a typical plant cell. | □ | □ | □ | 3.2 |
| Compare plant cells and animal cells and describe their similarities and differences. | □ | □ | □ | 3.2 |
| Relate the structures of some types of cells to their functions. | □ | □ | □ | 3.3 |
| Understand how cells are grouped into tissues, organs and organ systems. | □ | □ | □ | 3.4 |