You will need:
- a slinky spring for each group (slinky springs made from metal work better than plastic ones), chalk or small pieces of paper
Do not suddenly release a spring that has been stretched.
1 Stretch the spring across a smooth, flat surface such as a long bench or the floor.
2 Use chalk or small pieces of paper to mark positions on the spring. These represent particles.
3 One person holds one end of the spring and keeps it still.
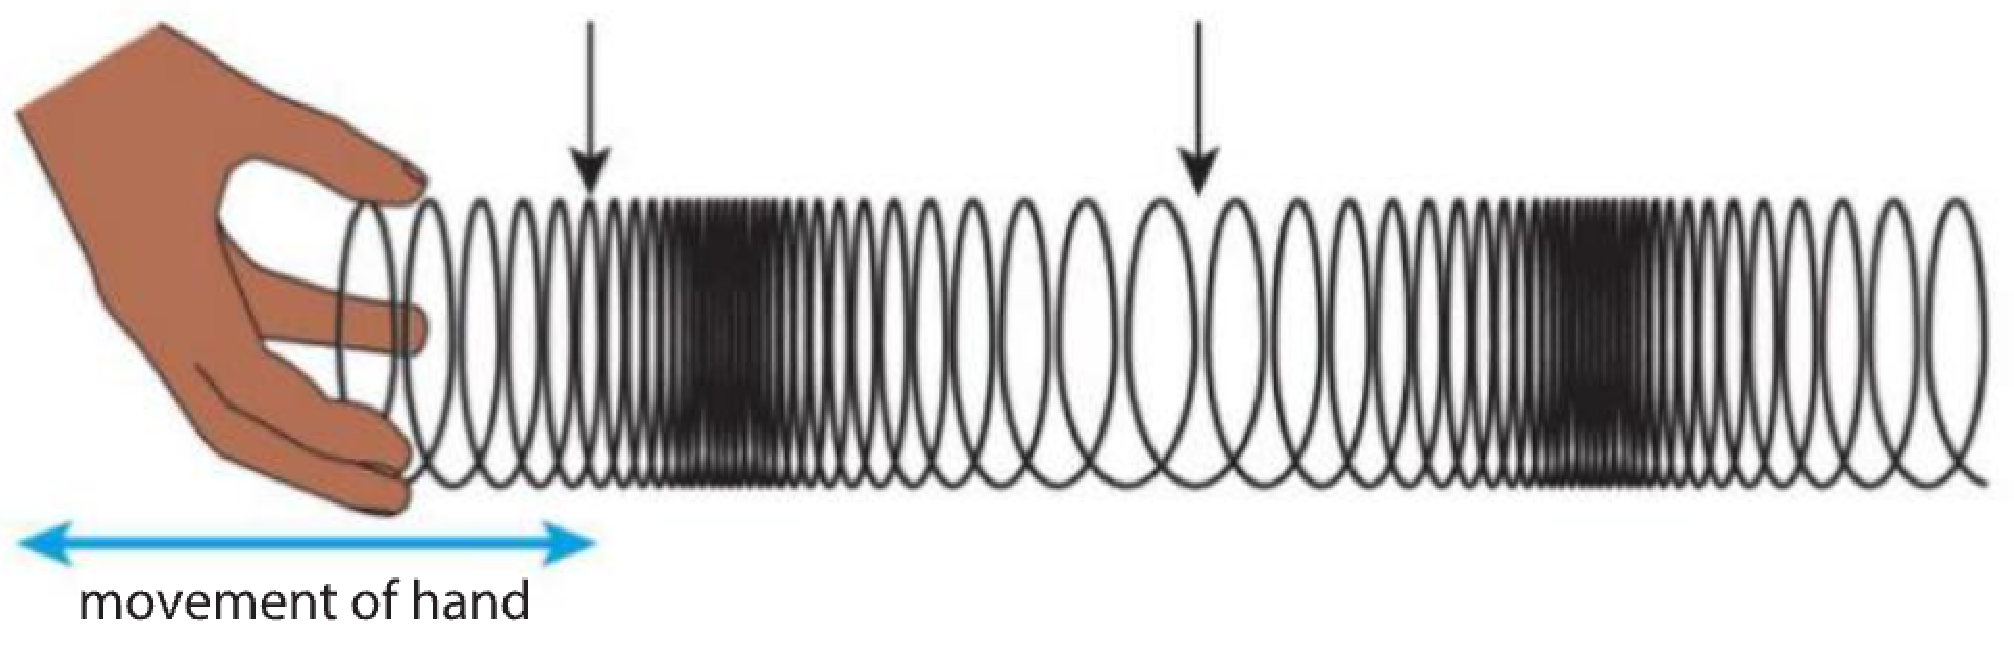
4 Another person holds the opposite end and moves the end of the spring backwards and forwards, as shown in the diagram. This will make a wave in the spring.
Movement of a slinky spring to show movement in a sound wave. The black arrows show possible positions of the chalk marks on the spring.
In your groups, discuss the answers to these questions.
1 In which direction does the wave in the spring move?
You will need:
- a slinky spring for each group (slinky springs made from metal work better than plastic ones), chalk or small pieces of paper
Do not suddenly release a spring that has been stretched.
1 Stretch the spring across a smooth, flat surface such as a long bench or the floor.
2 Use chalk or small pieces of paper to mark positions on the spring. These represent particles.
3 One person holds one end of the spring and keeps it still.
4 Another person holds the opposite end and moves the end of the spring backwards and forwards, as shown in the diagram. This will make a wave in the spring.
Movement of a slinky spring to show movement in a sound wave. The black arrows show possible positions of the chalk marks on the spring.
In your groups, discuss the answers to these questions.
3 In which direction do the marks that represent particles move?
You will need:
- a slinky spring for each group (slinky springs made from metal work better than plastic ones), chalk or small pieces of paper
Do not suddenly release a spring that has been stretched.
1 Stretch the spring across a smooth, flat surface such as a long bench or the floor.
2 Use chalk or small pieces of paper to mark positions on the spring. These represent particles.
3 One person holds one end of the spring and keeps it still.
4 Another person holds the opposite end and moves the end of the spring backwards and forwards, as shown in the diagram. This will make a wave in the spring.
Movement of a slinky spring to show movement in a sound wave. The black arrows show possible positions of the chalk marks on the spring.
In your groups, discuss the answers to these questions.
4 What did the person holding the fixed end of the spring feel from the spring?
You are going to investigate whether sound requires vibrations to travel.
Work in groups of three.
You will need:
- 2 disposable cups, a sharp object to make a small hole in the bottom of each cup, a string long enough to go across the classroom, scissors to cut the string
Safety
Take care when using the sharp object to make a hole in the cups.
1 Pass the string through the holes in the cups so that the open ends of the cups face away from each other. Make the string as long as possible.
2 Secure the string inside each cup by tying a knot.
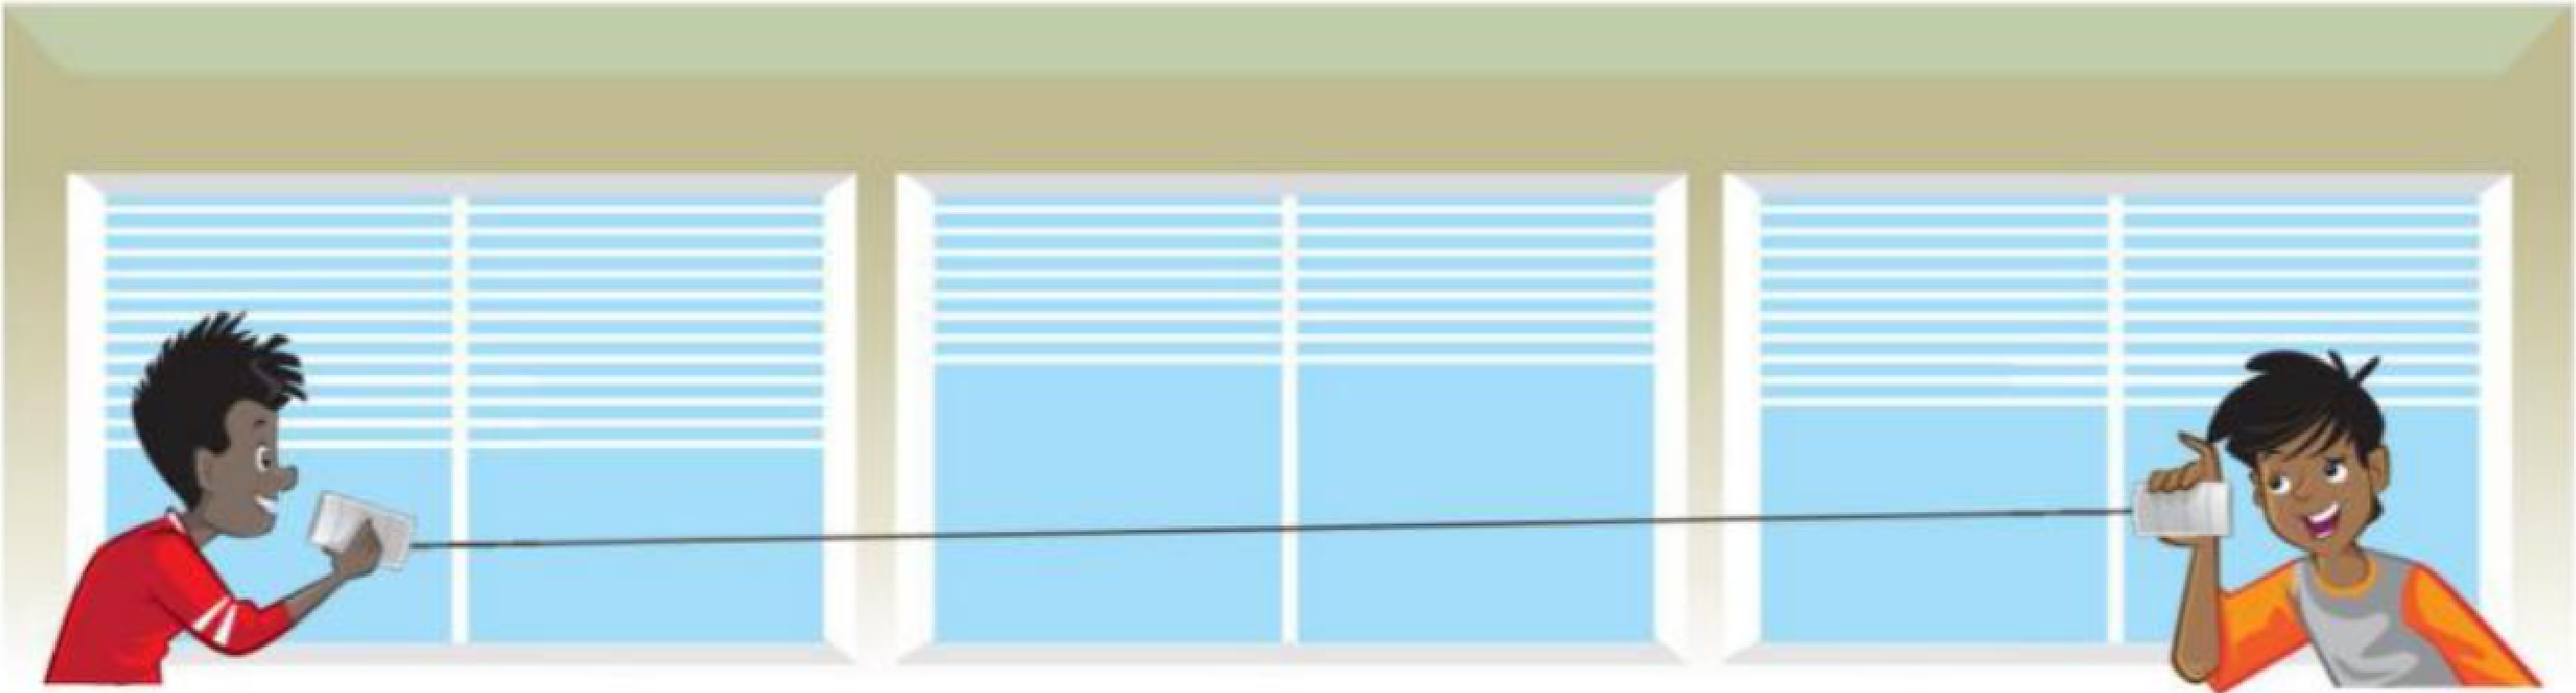
3 Set up the equipment as shown in the diagram. This is sometimes called a string telephone.
4 Pull the string tight between the cups.
5 The person speaking puts the cup over their mouth.
6 The person listening puts the cup over their ear.
7 Speak as quietly as possible, so that the person hears the sound of your voice through the string.
8 Let the string go slack. Say the same thing, with the same loudness, when the string is slack.
9 Pull the string tight again. The third member of the group should grip the string in their hand. Do this around the middle of the string and then in different places.
10 Say the same thing, with the same loudness, when the string is being gripped.
Questions
1 State what the sound wave passes through to travel between the cups.
You are going to investigate whether sound requires vibrations to travel.
Work in groups of three.
You will need:
- 2 disposable cups, a sharp object to make a small hole in the bottom of each cup, a string long enough to go across the classroom, scissors to cut the string
Safety
Take care when using the sharp object to make a hole in the cups.
1 Pass the string through the holes in the cups so that the open ends of the cups face away from each other. Make the string as long as possible.
2 Secure the string inside each cup by tying a knot.
3 Set up the equipment as shown in the diagram. This is sometimes called a string telephone.
4 Pull the string tight between the cups.
5 The person speaking puts the cup over their mouth.
6 The person listening puts the cup over their ear.
7 Speak as quietly as possible, so that the person hears the sound of your voice through the string.
8 Let the string go slack. Say the same thing, with the same loudness, when the string is slack.
9 Pull the string tight again. The third member of the group should grip the string in their hand. Do this around the middle of the string and then in different places.
10 Say the same thing, with the same loudness, when the string is being gripped.
Questions
2 Describe the difference in what you heard when the string was tight and when the string was slack.